Exploring two alternative declarative roads to Jupyter
Nix way, RCC way, or the high way?
I’m a fan of Project Jupyter, which develops and maintains interactive computing environments for all programming languages. Mostly known for JupyterLab and Jupyter Notebook. Yet, I use them much less than I’d like to. Most probably, because I am missing a convenient way to define and maintain local Jupyter environments within those projects where they could be useful.
Q: Explain how declarative configuration differs from imperative configuration in a tweet.
A: Declarative configuration focuses on what the desired end state should be, while imperative configuration focuses on the specific steps needed to achieve that end state. In declarative configuration, the system automatically sets up the necessary resources and configurations, whereas in imperative configuration, the user must explicitly define and execute each step. #declarativeconfig #imperativeconfig -ChatGPT
As of today, I might have found the way I have been looking for. Unfortunately, it might not be Nix, but something else, that everyone can use in minutes. That said, let’s try out the Nix way at first.
Status quo: jupyterWith
jupyterWith is a project, which helps to define and maintain Jupyter environments with Nix, the purely functional package manager. Let’s assume that Nix has already been installed and “flakes” enabled as told in withJupyter’s documentation. Then we continue to follow the docs to create JupyterLab with Robot Framework kernel.
At first, we need to scaffold the base environment with:
$ nix flake init --template github:tweag/jupyterWith
wrote: .../flake.nix
wrote: .../default.nix
wrote: .../kernels/python
wrote: .../kernels

    You have created a jupyterWith template.

    Run nix run to immediately try it out.

    See the jupyterWith documentation for more information.

    https://github.com/tweag/jupyterWith/blob/main/docs/how-to.md
    https://github.com/tweag/jupyterWith/blob/main/docs/tutorials.md
And then we are able to start the default setup with:
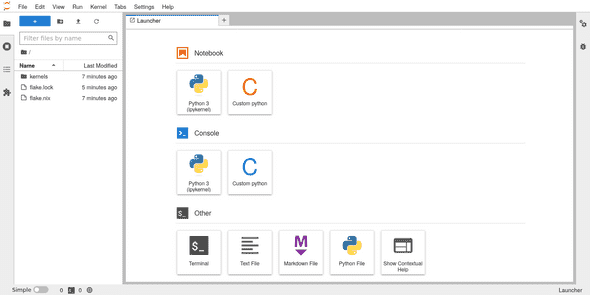
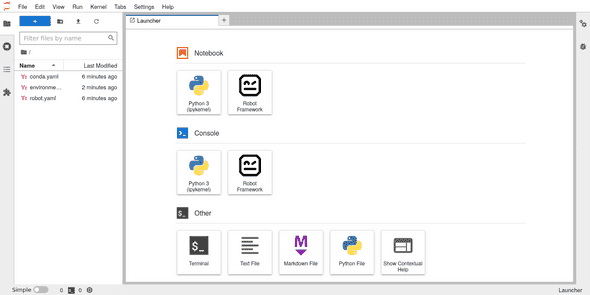
$ nix runAlthough, this gives us JupyterLab with only plain Python kernel. It’s good to know that jupyterWith properly separates JupyterLab from its kernels, and is then able to support any number of different kernels or configurations in a single environment. Thankfully, to get started with custom kernel configuration, it has already created us a template for Python kernel with custom packages.
But it took a couple of hours for me to figure out, how to customize jupyterWith’s Python kernel setup to run Python based RobotFramework kernel instead. That required defining a Python environment with RobotKernel into the Python custom kernel template at ./kernels/python with Poetry:
$ poetry init

This command will guide you through creating your pyproject.toml config.

Package name [python]:  robotkernel-env

Would you like to define your main dependencies interactively? (yes/no) [yes]

Search for package to add (or leave blank to continue): robotkernel

Enter package # to add, or the complete package name if it is not listed:
 [0] robotkernel
 [1] jupyterlite-robotkernel
 > 0

Do you confirm generation? (yes/no) [yes]
And, of course, lock its dependencies:
$ poetry lock
Creating virtualenv robotkernel-env-aFhfNoGt-py3.9 in .../.cache/pypoetry/virtualenvs
Updating dependencies
Resolving dependencies... (31.3s)

Writing lock file
And, finally, the hard part… With the following ./kernels/python/default.nix:
{
  name,
  availableKernels,
  extraArgs,
}:
let base = availableKernels.python {
  projectDir = ./.;
  displayName = "Robot Framework";
  name = "robotframework";
  preferWheels = true;
}; in {
  path = ./kernel.nix;
  args = base.args // { inherit (base) path; };
}
And ./kernels/python/kernel.nix:
args@{ path, ...}:

let
  base = import path (builtins.removeAttrs args [ "path" ]);
in base // {
  argv = [
    (builtins.head base.argv)
    "-m"
    "robotkernel.kernel"
    "-f"
    "{connection_file}"
  ];
  language = "robotframework";
  codemirrorMode = "robotframework";
}
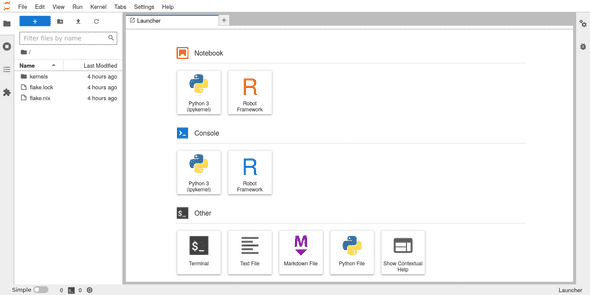
I was able to have my declarative JupyterLab with Robot Framework kernel started simply with re-running nix run.
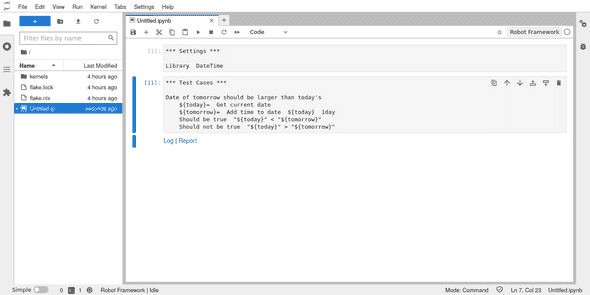
Unfortunately, even after all that, my JupyterLab was still missing syntax highlighting for Robot Framework code. That would have required additional configuration for Nix-packaging and installation of jupyterlab-robotmode extension into the Python environment of JupyterLab itself.
According to jupyterWith’s documentation. They are still working on to support declarative configuration for extensions… Fair enough.
Contender: RCC
How about the challenger? RCC is an open source environment management and task execution tool from Robocorp. Initially designed to manage environments and execution of Robot Framework and Python RPA bots, but technically generic enough to manage any environment based on packages available at Conda repositories or installable with Pip. (Under the hood it is using Miniconda as its package manager.)
RCC is installed usually just by downloading a precompiled binary. Then it requires two files to built the environment and start a program from it. So, let’s have conda.yaml:
channels
conda-forge
dependencies
jupyterlab
pip
robotkernel
jupyterlab-robotmodeAnd robot.yaml:
tasks
lab
shelljupyter lab
condaConfigFile
conda.yaml
artifactsDir
.Once these are in place, the sole task from robot.yaml run from the environment defined in conda.yaml can be run with:
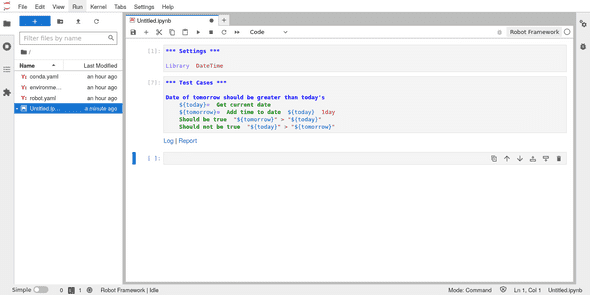
$ rcc task runThis was all that was required to have a declaratively configured JupyterLab launched from a project directory. And this time also syntax highlighting was enabled:
Looks like we have a winner!
How about reproducibility?
Was this a fair comparison? Not completely. Nix package manager is built to maximize reproducibility, while Conda used by RCC promises more like “best effort” for it. Also, jupyterWith is clearly desiged to support even complex JupyterLab environments with multiple kernels. Meanwhile my current use case required only one kernel at time, and mostly based on Python. Therefore installing kernel packages into the same environment with JupyterLab itself is feasible.
That said, RCC tries its best to make the environment as reproducible as possible with Conda. When rcc task run is run with ambiquous conda.yaml, it also generates environment_[system]_[arch]_freeze.yaml (e.g. environment_linux_amd64_freeze.yaml) with all the installed packages:
channels
conda-forge
dependencies
_libgcc_mutex=0.1
_openmp_mutex=4.5
anyio=3.6.2
argon2-cffi=21.3.0
argon2-cffi-bindings=21.2.0
asttokens=2.2.1
attrs=22.1.0
babel=2.11.0
backcall=0.2.0
backports=1.0
backports.functools_lru_cache=1.6.4
beautifulsoup4=4.11.1
bleach=5.0.1
brotlipy=0.7.0
bzip2=1.0.8
ca-certificates=2022.12.7
certifi=2022.12.7
cffi=1.15.1
charset-normalizer=2.1.1
cryptography=38.0.4
debugpy=1.6.4
decorator=5.1.1
defusedxml=0.7.1
entrypoints=0.4
executing=1.2.0
flit-core=3.8.0
idna=3.4
importlib-metadata=5.1.0
importlib_resources=5.10.1
ipykernel=6.14.0
ipython=8.4.0
ipython_genutils=0.2.0
jedi=0.18.2
jinja2=3.1.2
json5=0.9.5
jsonschema=4.17.3
jupyter_client=7.4.8
jupyter_core=5.1.0
jupyter_events=0.5.0
jupyter_server=2.0.1
jupyter_server_terminals=0.4.2
jupyterlab=3.5.1
jupyterlab_pygments=0.2.2
jupyterlab_server=2.16.5
ld_impl_linux-64=2.39
libffi=3.4.2
libgcc-ng=12.2.0
libgomp=12.2.0
libnsl=2.0.0
libsodium=1.0.18
libsqlite=3.40.0
libstdcxx-ng=12.2.0
libuuid=2.32.1
libzlib=1.2.13
markupsafe=2.1.1
matplotlib-inline=0.1.6
mistune=2.0.4
nbclassic=0.4.8
nbclient=0.7.2
nbconvert=7.2.6
nbconvert-core=7.2.6
nbconvert-pandoc=7.2.6
nbformat=5.7.0
ncurses=6.3
nest-asyncio=1.5.6
notebook=6.5.2
notebook-shim=0.2.2
openssl=3.0.7
packaging=22.0
pandoc=2.19.2
pandocfilters=1.5.0
parso=0.8.3
pexpect=4.8.0
pickleshare=0.7.5
pip=22.3.1
pkgutil-resolve-name=1.3.10
platformdirs=2.6.0
prometheus_client=0.15.0
prompt-toolkit=3.0.36
psutil=5.9.4
ptyprocess=0.7.0
pure_eval=0.2.2
pycparser=2.21
pygments=2.13.0
pyopenssl=22.1.0
pyrsistent=0.19.2
pysocks=1.7.1
python=3.10.8
python-dateutil=2.8.2
python-fastjsonschema=2.16.2
python-json-logger=2.0.1
python_abi=3.10
pytz=2022.6
pyyaml=6.0
pyzmq=24.0.1
readline=8.1.2
requests=2.28.1
send2trash=1.8.0
setuptools=65.5.1
six=1.16.0
sniffio=1.3.0
soupsieve=2.3.2.post1
stack_data=0.6.2
terminado=0.15.0
tinycss2=1.2.1
tk=8.6.12
tomli=2.0.1
tornado=6.2
traitlets=5.7.1
typing_extensions=4.4.0
tzdata=2022g
urllib3=1.26.13
wcwidth=0.2.5
webencodings=0.5.1
websocket-client=1.4.2
wheel=0.38.4
xz=5.2.6
yaml=0.2.5
zeromq=4.3.4
zipp=3.11.0
pip
arrow==1.2.3
backports.functools-lru-cache==1.6.4
docutils==0.19
fastjsonschema==2.16.2
flit_core==3.8.0
fqdn==1.5.1
importlib-resources==5.10.1
ipython-genutils==0.2.0
ipywidgets==8.0.3
isoduration==20.11.0
jsonpointer==2.3
jupyter-events==0.5.0
jupyterlab-pygments==0.2.2
jupyterlab-robotmode==0.3.1
jupyterlab-widgets==3.0.4
lunr==0.6.2
notebook_shim==0.2.2
Pillow==9.3.0
pkgutil_resolve_name==1.3.10
prometheus-client==0.15.0
pure-eval==0.2.2
rfc3339-validator==0.1.4
rfc3986-validator==0.1.1
robotframework==6.0.1
robotkernel==1.6
stack-data==0.6.2
uri-template==1.2.0
webcolors==1.12
widgetsnbextension==4.0.4Adding this to robot.yaml:
tasks
notebook
shelljupyter lab
condaConfigFile
conda.yaml
artifactsDir
.
environmentConfigs
environment_linux_amd64_freeze.yamlshould help the environment to build and run with the same version also on other machines.
P.S. You may disable RCC telemetry with rcc configuration identity -t.
P.P.S. Check RCC authors Tips, tricks, and recipies for more interesting features and use cases.
