Building instant features with advanced Plone themes
Plone, ”The Ultimate Enterprise CMS”, ships with built-in batteries for building sophisticated content management solutions without writing a single line of new Python code. For example, a fresh installation of Plone allows to build custom structured content types with custom HTML views, define custom state based workflows, customize various user interface elements, and finish the user experience by configuring custom event triggered content rules to react on users’ actions. Not to mention the Diazo based theming tool, which allows unlimited tweaking of the resulting HTML.
All this by just clicking and typing things through-the-web (TTW) with your browser.
Yet, still some say that Plone is a difficult to customize and extend.
The flip side of customizing Plone TTW is that it’s way too easy to lost track of your customizations. That adds to technical debt and therefore cost of maintaining those customizations over years and upgrades to future Plone releases. The suggested solution to avoid those problems has long been to avoid TTW customizations altogether, in favor of customizing everything using “buildout-installed file-system Python packages”. But that makes customizing Plone feel unnecessary difficult and technical.
At Plone Conference 2017 I gave a talk, where I showed an alternative way for this: if it was possible to bundle all those customizations together, for example in TTW managed theme, maintaining those customizations would no longer be the blocker.
Customizing Plone could be made easy again.
Requirements
Technically, Plone has supported exporting and importing most of the possible TTW customizations for more than ten years, but the user interface for that has been cumbersomely technical. Finally, Plone 4.1 introduced a new Diazo based theming feature with easy to use theming control panel and theme editor. And now, with only a couple of extra packages in your Plone setup, Plone theming features get super powers to apply site customizations with any theme.
To complete the following example, you need a Plone site with these two extra Python packages installed: collective.themesitesetup and collective.themefragments.
As usual, those can be installed by customizing and running buildout
[instance]
eggs =
    ...
    collective.themesitesetup
    collective.themefragments
or you can try out with the official Plone docker image:
$ docker run -p 8080:8080 -e PLONE_ADDONS="collective.themesitesetup collective.themefragments" plone fgCase of the day: Wall of images
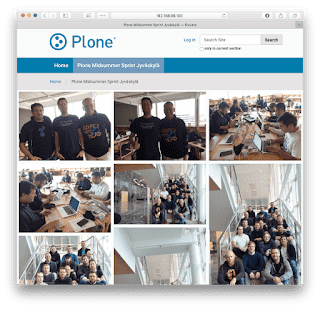
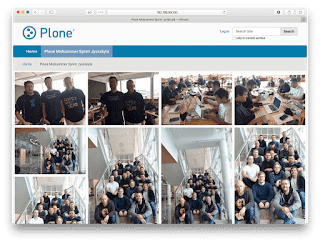
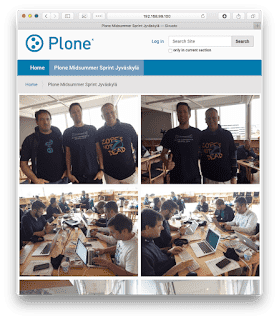
As an example feature, we build a simple folder view that displays a list of varying size images in an optimal grid layout using popular Masonry.js layout library, with help an another library called imagesLoaded.
To summarize, building that view requires:
- Providing JS bundles for both Masonry and imagesLoaded
- Registering those bundles into Plone resource registry
- A folder view template that renders images in that folder
- Way to configure that view on a folder
- JS code to initialize Masonry layout on that view
Getting started with theming
To get a fast start, we create a dummy theme base named demotheme that
simply re-uses styles and rules from Barceloneta, the default theme of
Plone 5. Your theme base should contain the following files:
./index.html./rules.xml./scripts.js./styles.css./manifest.cfg
At first, ./index.html is just a copy of the same theme file from
Barceloneta:
<!doctype html>
<html>
  <head>
    <title>Plone Theme</title>
    <link rel="shortcut icon" type="image/x-icon"
          href="++theme++barceloneta/barceloneta-favicon.ico" />
    <link rel="apple-touch-icon"
          href="++theme++barceloneta/barceloneta-apple-touch-icon.png" />
    <link rel="apple-touch-icon-precomposed" sizes="144x144"
          href="++theme++barceloneta/barceloneta-apple-touch-icon-144x144-precomposed.png" />
    <link rel="apple-touch-icon-precomposed" sizes="114x114"
          href="++theme++barceloneta/barceloneta-apple-touch-icon-114x114-precomposed.png" />
    <link rel="apple-touch-icon-precomposed" sizes="72x72"
          href="++theme++barceloneta/barceloneta-apple-touch-icon-72x72-precomposed.png" />
    <link rel="apple-touch-icon-precomposed" sizes="57x57"
          href="++theme++barceloneta/barceloneta-apple-touch-icon-57x57-precomposed.png" />
    <link rel="apple-touch-icon-precomposed"
          href="++theme++barceloneta/barceloneta-apple-touch-icon-precomposed.png" />
  </head>
  <body>
    <section id="portal-toolbar">
    </section>
    <div class="outer-wrapper">
      <header id="content-header">
        <div class="container">
          <header id="portal-top">
          </header>
          <div id="anonymous-actions">
          </div>
        </div>
      </header>
      <div id="mainnavigation-wrapper">
        <div id="mainnavigation">
        </div>
      </div>
      <div id="hero" class="principal">
        <div class="container">
          <div class="gigantic">
          </div>
        </div>
      </div>
      <div id="above-content-wrapper">
          <div id="above-content">
          </div>
      </div>
      <div class="container">
        <div class="row">
          <aside id="global_statusmessage"></aside>
        </div>
        <main id="main-container" class="row row-offcanvas row-offcanvas-right">
          <div id="column1-container">
          </div>
          <div id="content-container">
          </div>
          <div id="column2-container">
          </div>
        </main><!--/row-->
      </div><!--/container-->
    </div> <!--/outer-wrapper -->
    <footer id="portal-footer-wrapper">
      <div class="container" id="portal-footer"></div>
    </footer>
  </body>
</html>
Then, ./rules.xml does nothing more than includes the existing rules
directly from the always available Barceloneta theme:
<rules
xmlns="http://namespaces.plone.org/diazo"
xmlns:css="http://namespaces.plone.org/diazo/css"
xmlns:xsl="http://www.w3.org/1999/XSL/Transform"
xmlns:xi="http://www.w3.org/2001/XInclude">
<!-- Import Barceloneta rules -->
<xi:include href="++theme++barceloneta/rules.xml" />
</rules>File ./scripts.js starts empty and file ./styles.css with the
following content to reuse styles from Barceloneta theme:
@import "../++theme++barceloneta/less/barceloneta-compiled.css";

.plone-breadcrumb ol {
    padding: 18px 0;
    font-size: 14px;
}
They both should be registered as the implicit “theme bundle” (or
“Diazo-bundle”) in ./manifest.cfg by setting production-css and
production-js attributes as follows:
[theme]
title = Demo Theme
description =
production-css = /++theme++demotheme/styles.css
production-js = /++theme++demotheme/scripts.js
Saving these files and enabling the theme should already give the basic Barceloneta experience. But let’s continue to extend it with our special feature…
Registering Masonry.js bundles
Plone 5 resource registry supports many ways to configure new front end resources. We go with the easy way by simply downloading the 3rd party JS distributions and registering them mostly as such for Plone with the following steps:
-
Create folder
./bundlesinto theme to keep the required front-end bundles separate from the other theme files -
Download the official minified Masonry.js distribution and save it as
./bundles/masonry.pkgd.min.js -
Download the official minified imagesLoaded distribution and save it as
./bundles/imagesloaded.pkgd.min.js -
Edit both of the previous files by adding line
(function() { var require, define;into the beginning of the file, and line
})();into the end of the file. These are required for any “AMD packaged” JS distribution to work in Plone’s Require.js based JS environment.
-
Add two empty files
./bundles/masonry.pkgd.min.cssand./bundles/imagesloaded.pkgd.min.cssfor pleasing the Plone resource registry in the next step. -
Create folder
./installwith file./install/registry.xmlwith the following contents to register the above bundles into Plone resource registry:<registry> <records prefix="plone.bundles/imagesloaded-js" interface="Products.CMFPlone.interfaces.IBundleRegistry"> <value key="depends">plone</value> <value key="jscompilation">++theme++demotheme/bundles/imagesloaded.pkgd.min.js</value> <value key="csscompilation">++theme++demotheme/bundles/imagesloaded.pkgd.min.css</value> <value key="last_compilation">2017-10-06 00:00:00</value> <value key="compile">False</value> <value key="enabled">True</value> </records> <records prefix="plone.bundles/masonry-js" interface="Products.CMFPlone.interfaces.IBundleRegistry"> <value key="depends">imagesloaded-js</value> <value key="jscompilation">++theme++demotheme/bundles/masonry.pkgd.min.js</value> <value key="csscompilation">++theme++demotheme/bundles/masonry.pkgd.min.css</value> <value key="last_compilation">2017-10-06 00:00:00</value> <value key="compile">False</value> <value key="enabled">True</value> </records> </registry>
Now, once edited theme files are saved and the theme re-activated or updated, thanks to collective.themesitesetup, every response from our site should include our these new resources.
Creating a folder view with list of images
Creating a view with collective.themefragments is similar for
writing any view template for Plone. Simply add a folder ./fragments
into your theme with our example view ./fragments/wall_of_images.pt
with the following contents:
<html xmlns="http://www.w3.org/1999/xhtml" xml:lang="en"
      xmlns:tal="http://xml.zope.org/namespaces/tal"
      xmlns:metal="http://xml.zope.org/namespaces/metal"
      xmlns:i18n="http://xml.zope.org/namespaces/i18n"
      lang="en"
      metal:use-macro="context/main_template/macros/master"
      i18n:domain="plone">
<body>
<metal:main fill-slot="main">
  <metal:content-core define-macro="content-core">
    <div class="wall-of-images container-fluid"
         tal:define="items context/@@contentlisting">
      <tal:image tal:repeat="item items">
        <img tal:define="obj item/getObject;
                         scale_func obj/@@images;
                         scaled_image python:scale_func.scale('image', scale='preview')"
             tal:replace="structure python:scaled_image.tag()"
             tal:on-error="string:error" />
      </tal:image>
    </div>
  </metal:content-core>
</metal:main>
</body>
</html>
Please, note, how the view template uses
plone.app.contentlisting
API for iterating through every item in the folder and then
plone.app.imaging API
for rendering image tags for scaled images. Also, note the use of
tal:on-error to suppress all possible error messages (you may not
always want that, though).
Enabling the view on a site
Unfortunately, collective.themefragments’ views do not magically
appear into Plone toolbar display menu yet. Fortunately, those views can
be either be set as the default view of a content type or manually
assigned to a content item by setting its layout-property:
-
At first, let’s assume that we have a folder
http://localhost:8080/Plone/wall-of-images -
Then, let’s open the good old properties edit form for it
http://localhost:8080/Plone/wall-of-images/manage_propertiesForm -
Finally, let’s add a new property of type
stringwith namelayoutand value++themefragment++wall_of_images
Now the content should be rendered using our brand new template, displaying all the images one after one. It still does not look as intended, though, because nothing enables Masonry.js for it.
Invoking Masonry.js on the view
To enable Masonry.js on our brand new view, we could add the following
code into a theme file ./scripts.js:
jQuery(function($) {
  $('.wall-of-images').imagesLoaded(function() {
    $('.wall-of-images').masonry({
      itemSelector: 'img',
      percentPosition: true
    });
  });
});
That code simply uses jQuery to find our view templates main element and configures Masonry.js for it after every image below it has been loaded.
An alternative for that jQuery script would be to rely on Plone’s Require.js setup and define the code as a pattern:
require([
  'pat-base'
], function(Base) {
  'use strict';

  var Masonry = Base.extend({
    name: 'masonry',
    trigger: '.wall-of-images',

    init: function() {
      var self = this;
      self.$el.imagesLoaded(function() {
        self.$el.masonry({
          itemSelector: 'img',
          percentPosition: true
        });
      });
    }
  });

  return Masonry;
});
But something is still missing. Masonry.js is distributed without any
default styles. To make our wall of images look as it should, we need to
define responsive styles with our desired breakpoints in ./styles.css:
@media only screen {
   .wall-of-images {
        padding-left: 0;
        padding-right: 0;
        margin-top: -20px;
    }
    .wall-of-images img {
        float: left;
        width: 100%;
        height: auto;
        border: 5px solid transparent;
    }
}

@media only screen and (min-width: 768px) {
    .wall-of-images img {
        float: left;
        width: 50%;
        height: auto;
    }
}

@media screen and (min-width: 900px) {
    .wall-of-images img {
        float: left;
        width: 33.3333333%;
        height: auto;
    }
}

@media screen and (min-width: 1200px) {
  .wall-of-images img {
        float: left;
        width: 25%;
        height: auto;
    }
}
Finally, we’d like to make our wall of images be displayed on full
browser window width. That’s a bit tricky, because we need to escape
Barceloneta theme’s default content container, but still fully possible
by adding the following Diazo rules into ./rules.xml:
<!-- Wall of Images -->
<rules css:if-content=".wall-of-images">
  <!-- Make fullwidth -->
  <replace css:theme=".outer-wrapper > .container"
           css:content=".wall-of-images" />
  <!-- Include status message -->
  <before css:theme=".outer-wrapper > .container"
          css:content="#global_statusmessage"
          css:if-content=".wall-of-images" />
  <replace css:content="#global_statusmessage">
    <div id="global_statusmessage" class="container-fluid">
      <xsl:apply-templates />
    </div>
  </replace>
</rules>
Now our wall of images shines in every resolution:
PS. If want to learn more, my talk materials include a more complex example with custom content types, workflows, permissions, portlet assignments and content rules.


