ploneCustom for Plone 5
No more custom skins folder with infamous ploneCustom in Plone 5, they said.
Well, they can take away the skins folder, but they cannot take away our ploneCustom. I know, that the recommended way of customizing Plone 5 is via a custom theme through the Theming control panel from Site Setup. Still, sometimes you only need to add a few custom rules on top of an existing theme and creating a completely new theme would feel like an overkill.
Meet the new resource registry
One of the many big changes in Plone 5 is the completely new way how CSS and JavaScript resources are managed. Plone 5 introduces a completely new Resource Registries control panel and two new concepts to manage CSS ja JavaScipt there: resources and resource bundles.
Resource is a single CSS / LESS file, a single JavaScript file, or one of both, to provide some named feature for Plone 5. For example, a new embedded JavaScript based applet could be defined as a resource containing both its JavaScript code and required CSS /LESS stylesheet. In addition to those single files, JavaScript-files can depend on named requirejs modules provided by the other resources. Also LESS files can include any amount of available other LESS files. (LESS is superset of CSS with some optional superpowers like hierarchical directives, variables or optimized includes.)
Resource Bundle is a composition of named resources, which is eventually built into a single JavaScript and/or CSS file to be linked with each rendered page. When the page is rendered, bundles are linked (using either script-tags or stylesheet link-tags) in an order depending on their mutual dependencies. Bundles can be disabled and they can have conditions, so bundles are somewhat comparable to the legacy resource registry registrations in Plone 4 and earlier.
Now that you should be familiar with the concepts, you can bring our precious ploneCustom back to life.
Defining the next generation ploneCustom
These steps will define a new ploneCustom bundle, which provides both a custom CSS (with LESS) and a custom JavaScript file to allow arbitrary site customizations without introducing a new theme.
Creating and editing
At first, you need to add the actual LESS and JavaScript files. Instead of the deprecated skins custom folder you can add them into your Plone 5 site by using the old friend, ZMI (Zope Management Interface).
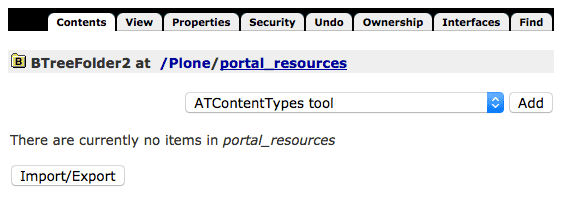
If you are running evelopment site, please, open the following url: http://localhost:8080/Plone/portal\_resources/manage\_main
This portal_resources is the new database (ZODB) based storage for any kind of custom resources (introduced with the new Theming control panel in Plone 4.3). Its functionality is based on plone.resource, but right now you only need to know how to use it with Plone 5 resource registries.
-
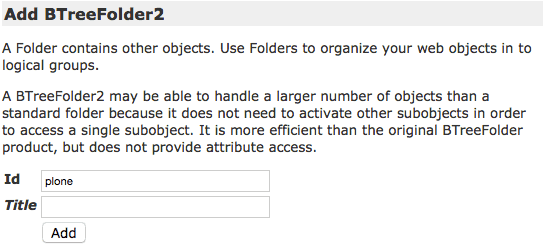
So, in portal_resources, add a new BTreeFolder2 with name plone:
-
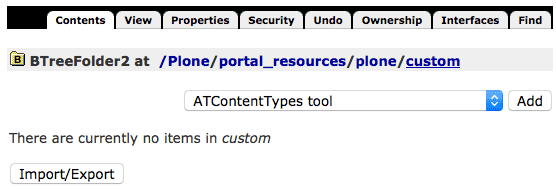
Then navigate into that folder (select plone and press Edit button) and add an another BTreeFolder2 with name custom and navigate into that folder until you are at portal_resources/plone/custom:
-
Now Add a new File named ploneCustom.js and another named ploneCustom.less:
-
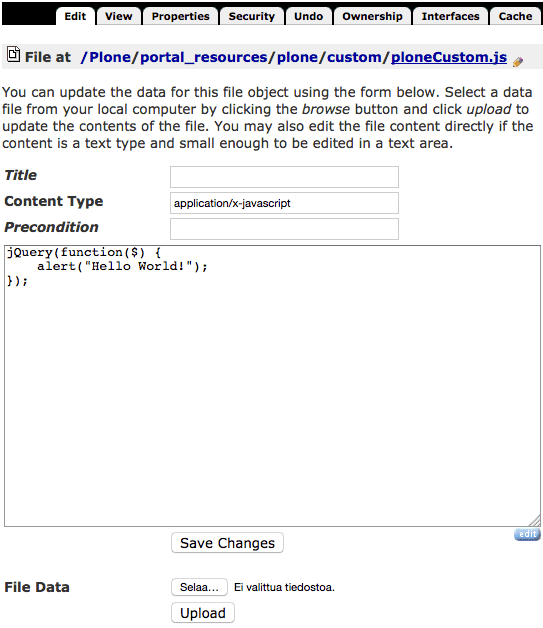
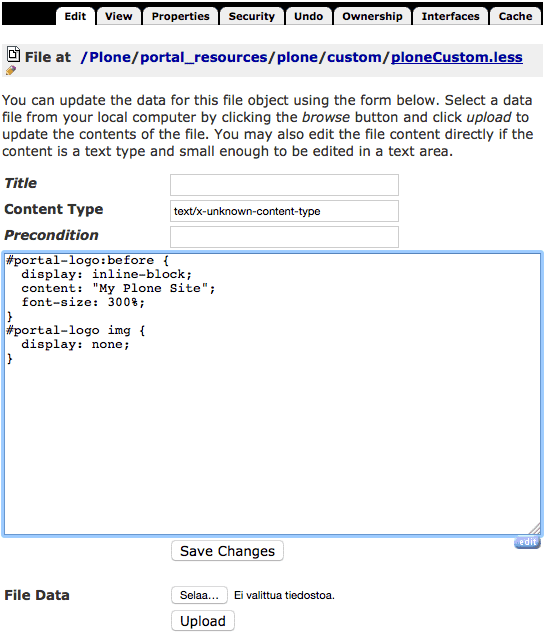
And, finally, you can navigate into those files (select and press Edit button) to edit and save them with your CSS and JavaScript:
The example JavaScript above would only annoy to to tell that it works:
jQuery(function($) {
    alert("Hello World!");
});
The example CSS above would replace the portal logo with a custom text:
#portal-logo:before {
  display: inline-block;
  content: "My Plone Site";
  font-size: 300%;
}
#portal-logo img {
  display: none;
}
In addition to that, you could add a little bit extra to learn more. These following lines would re-use button classes from Bootstrap 3 resources shipped with with Plone 5 (beta). This is an example of how to use LESS to cherry pick just a few special CSS rules from Bootstrap 3 framework and apply them next to the currently active theme:
@import (reference) "../++plone++static/components/bootstrap/less/bootstrap.less";
#searchGadget_form .searchButton {
  &:extend(.btn);
  &:extend(.btn-success);
}
Registering and enabling
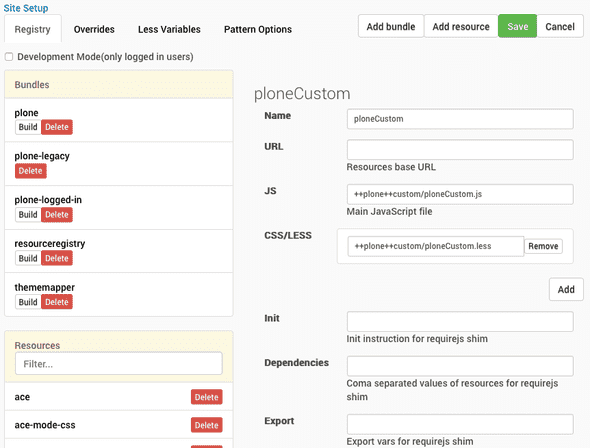
To register the resource and add it into a bundle (or create a new one), go to Resource Registries control panel (e.g. at http://localhost:8080/@\@resourceregistry-controlpanel). Click Add resource to show the add resource form and fill it like in the screenshot below:
Note that the strings ++plone++custom/ploneCustom.js and ++plone++custom/ploneCustom.less are actually relative (public) URLs for the resources you just added into portal_resources.
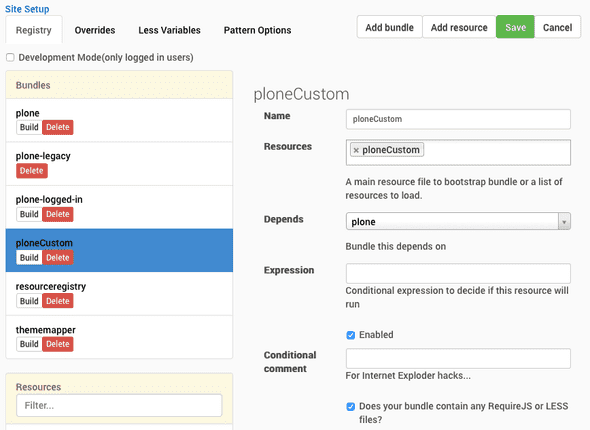
After saving the resoure by clicking Save, click Add bundle to create a new bundle for your ploneCustom-resource. Fill-in the opened form as follows:
Note that the bundle depends on Plone bundle. That makes it getting loaded only after Plone bundle, which includes jQuery, which our custom JavaScript code depends on. (Later you may wonder, why jQuery was not required with requirejs. That would also work and is recommended for other libraries, but currently you can rely on jQuery being globally available after Plone bundle has been loaded.)
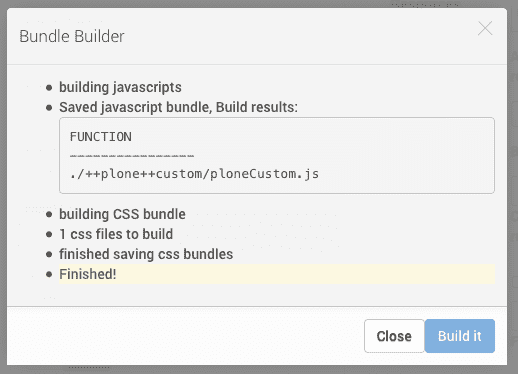
When you have saved the new ploneCustom resource bundle, it will appear into the Bundles list on the left. The final step is to click the Build button below the ploneCustom bundle label in that list. That will open a popup model to overview the build progress.
Once the build is done, you can click Close and reload the page to see your new ploneCustom bundle being applied for your site:
Note how the Plone logo has been replaced with a custom text and the Search button has been style after Bootstrap 3 button styles. (Also, you should now have seen an annoying alert popup from your ploneCustom JavasScript.)
To modify your ploneCustom bundle, just go to edit the file and and return to Resource Registries control panel to click the Build button again.
Now you have your ploneCustom back in Plone 5. Congratulations!
P.S. Don’t forget that you can also tweak (at least the default) Plone theme a lot from the Resource Registries control panel without ploneCustom bundle simply by changing theme’s LESS variables and building Plone bundle.
EXTRA: TTW ReactJS App in Plone
The new Resource Registries may feel complex to begin with, but once you get used to them, they are blessing. Just define dependencies properly, and never again you need to order Plone CSS and JavaScript resources manually, and never again (well, once add-ons get update into this new configuration) should add-ons break your site by re-registering resources into broken order.
As an example, let’s implement a ReactJS Hello World for Plone TTW using the new resource registry:
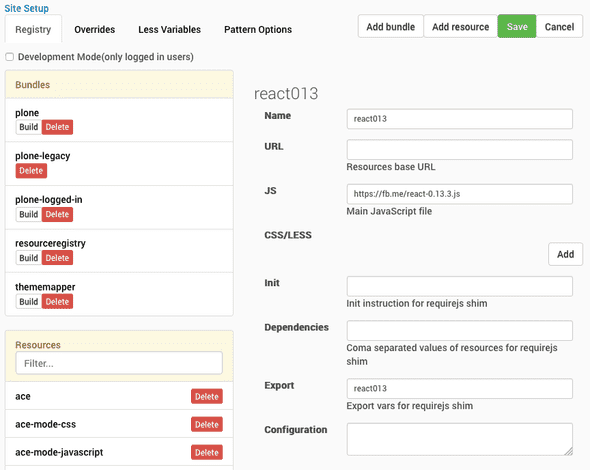
At first, you need to register ReactJS library as a resource. You could upload the library into portal_resources, but for a quick experiment you can also refer to a cloud hosted version (https://fb.me/react-0.13.3.js). So, go to Resource Registries control panel and Add resource with the following details:
Note how the library is defined to be wrapped for requirejs with name react013. (Plone 5 actually ships with ReactJS library, but because the version in the first beta is just 0.10, we need to add newer version with a version specific name.)
Next, go to portal_resources/plone/custom/manage_main as before and add a new file called reactApp.js with the following ReactJS Hello World as its contents:
define([
  'react013',
], function(React) {

'use strict';

var ExampleApplication = React.createClass({
  render: function() {
    var elapsed = Math.round(this.props.elapsed  / 100);
    var seconds = elapsed / 10 + (elapsed % 10 ? '' : '.0' );
    var message = 'React has been successfully running for ' + seconds + ' seconds.';
    return React.createElement("p", null, message);
  }
});

var start = new Date().getTime();

setInterval(function() {
  React.render(
    React.createElement(ExampleApplication, {elapsed: new Date().getTime() - start}),
    document.getElementById('portal-logo')
  );
}, 50);

return ExampleApplication;

});

jQuery(function($) {
  require(['reactApp']);
});
Note how ReactJS is required as react013, and how the example application is required as reactApp at the bottom (using jQuery onLoad convention).
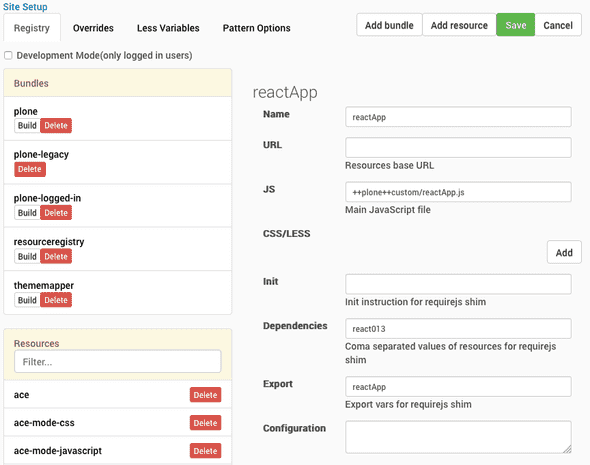
Of course, also reactApp must be defined as a new resource at Resource Registries control panel. It should depend on previously added resource react013 being wrapped for requirejs and export itself for requirejs as reactApp:
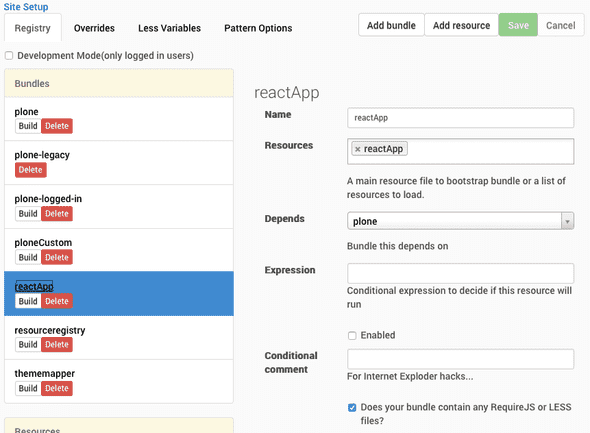
Finally, you can Add bundle for this example reactApp:
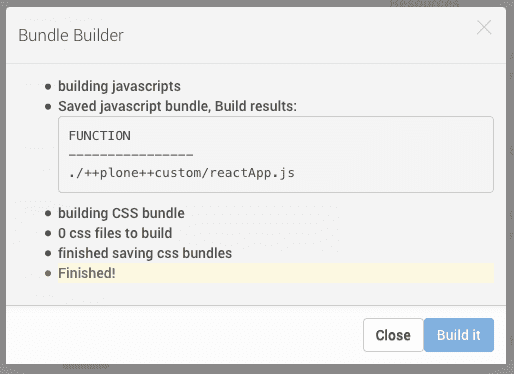
And after Save, Build the bundle from the button below the new bundle name in Bundles list:
Note that, because the cloud hosted ReactJS library was used, the new bundle contains only the code from reactApp.js and requirejs will require ReactJS from the cloud on-demand. If you would have added the library into portal_resources, it would have been included in the resulting bundle.
After page reload, your ReactJS Hello World should be alive:
